I plan on having some tech posts in this blog and this is one of them. While this one is not closely related to the material in the blog, I do use my car to transport many of my supplies that I use in my pond, my aquariums and in my gardens. I also want this post to help others who have similar needs.
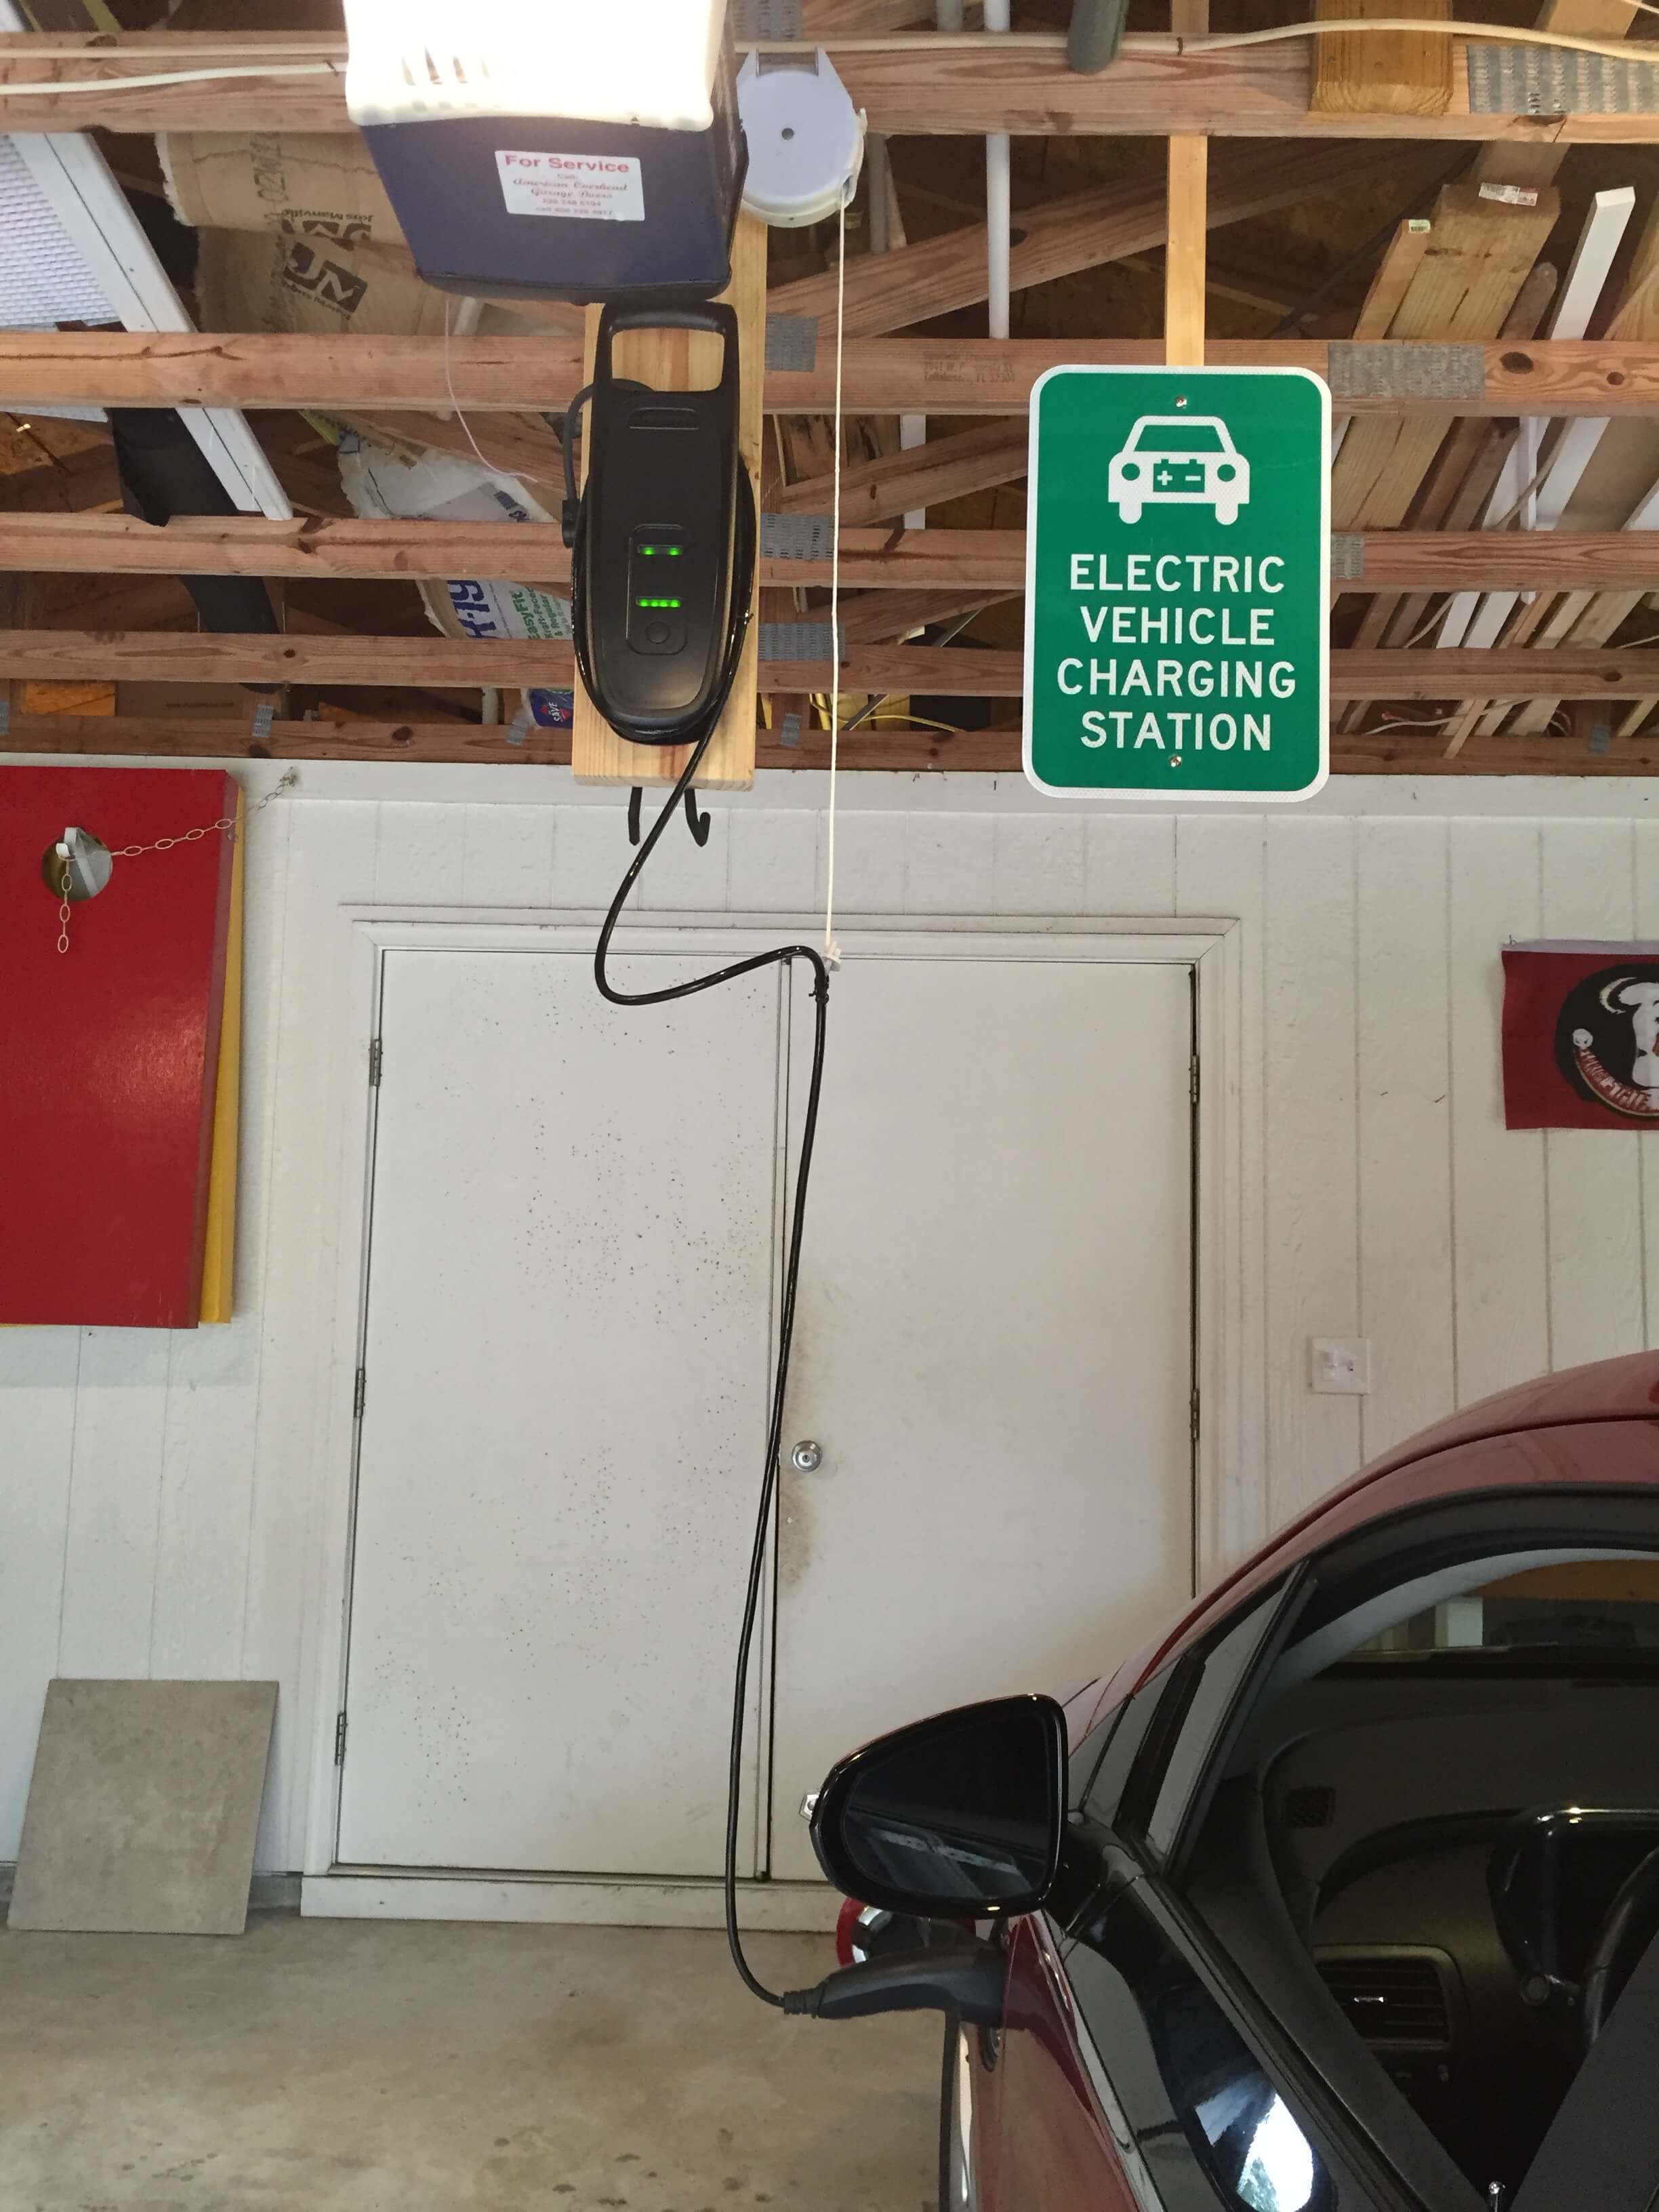
I have a 2012 Chevy Volt electric car with a range extender that I purchased new back in 2012. Even after 3 years of ownership I can still say that I absolutely love the car and would highly recommend it. One of the best things about it is that I can fuel up the car at home and I rarely (only a couple times a year) ever visit a gas station. The charging station is something I use at least twice a day, so installing it correctly is very important. The Chevy Volt comes with a 110v car charging station that plugs into an ordinary household outlet. You can purchase a better and faster 240v charger but in my circumstance the 110v charger works perfectly fine for me for now. In many ways the installation instructions below should also work for a 240v charging station however the retractable laundry line will not be strong enough so you will need to find something better in that case.
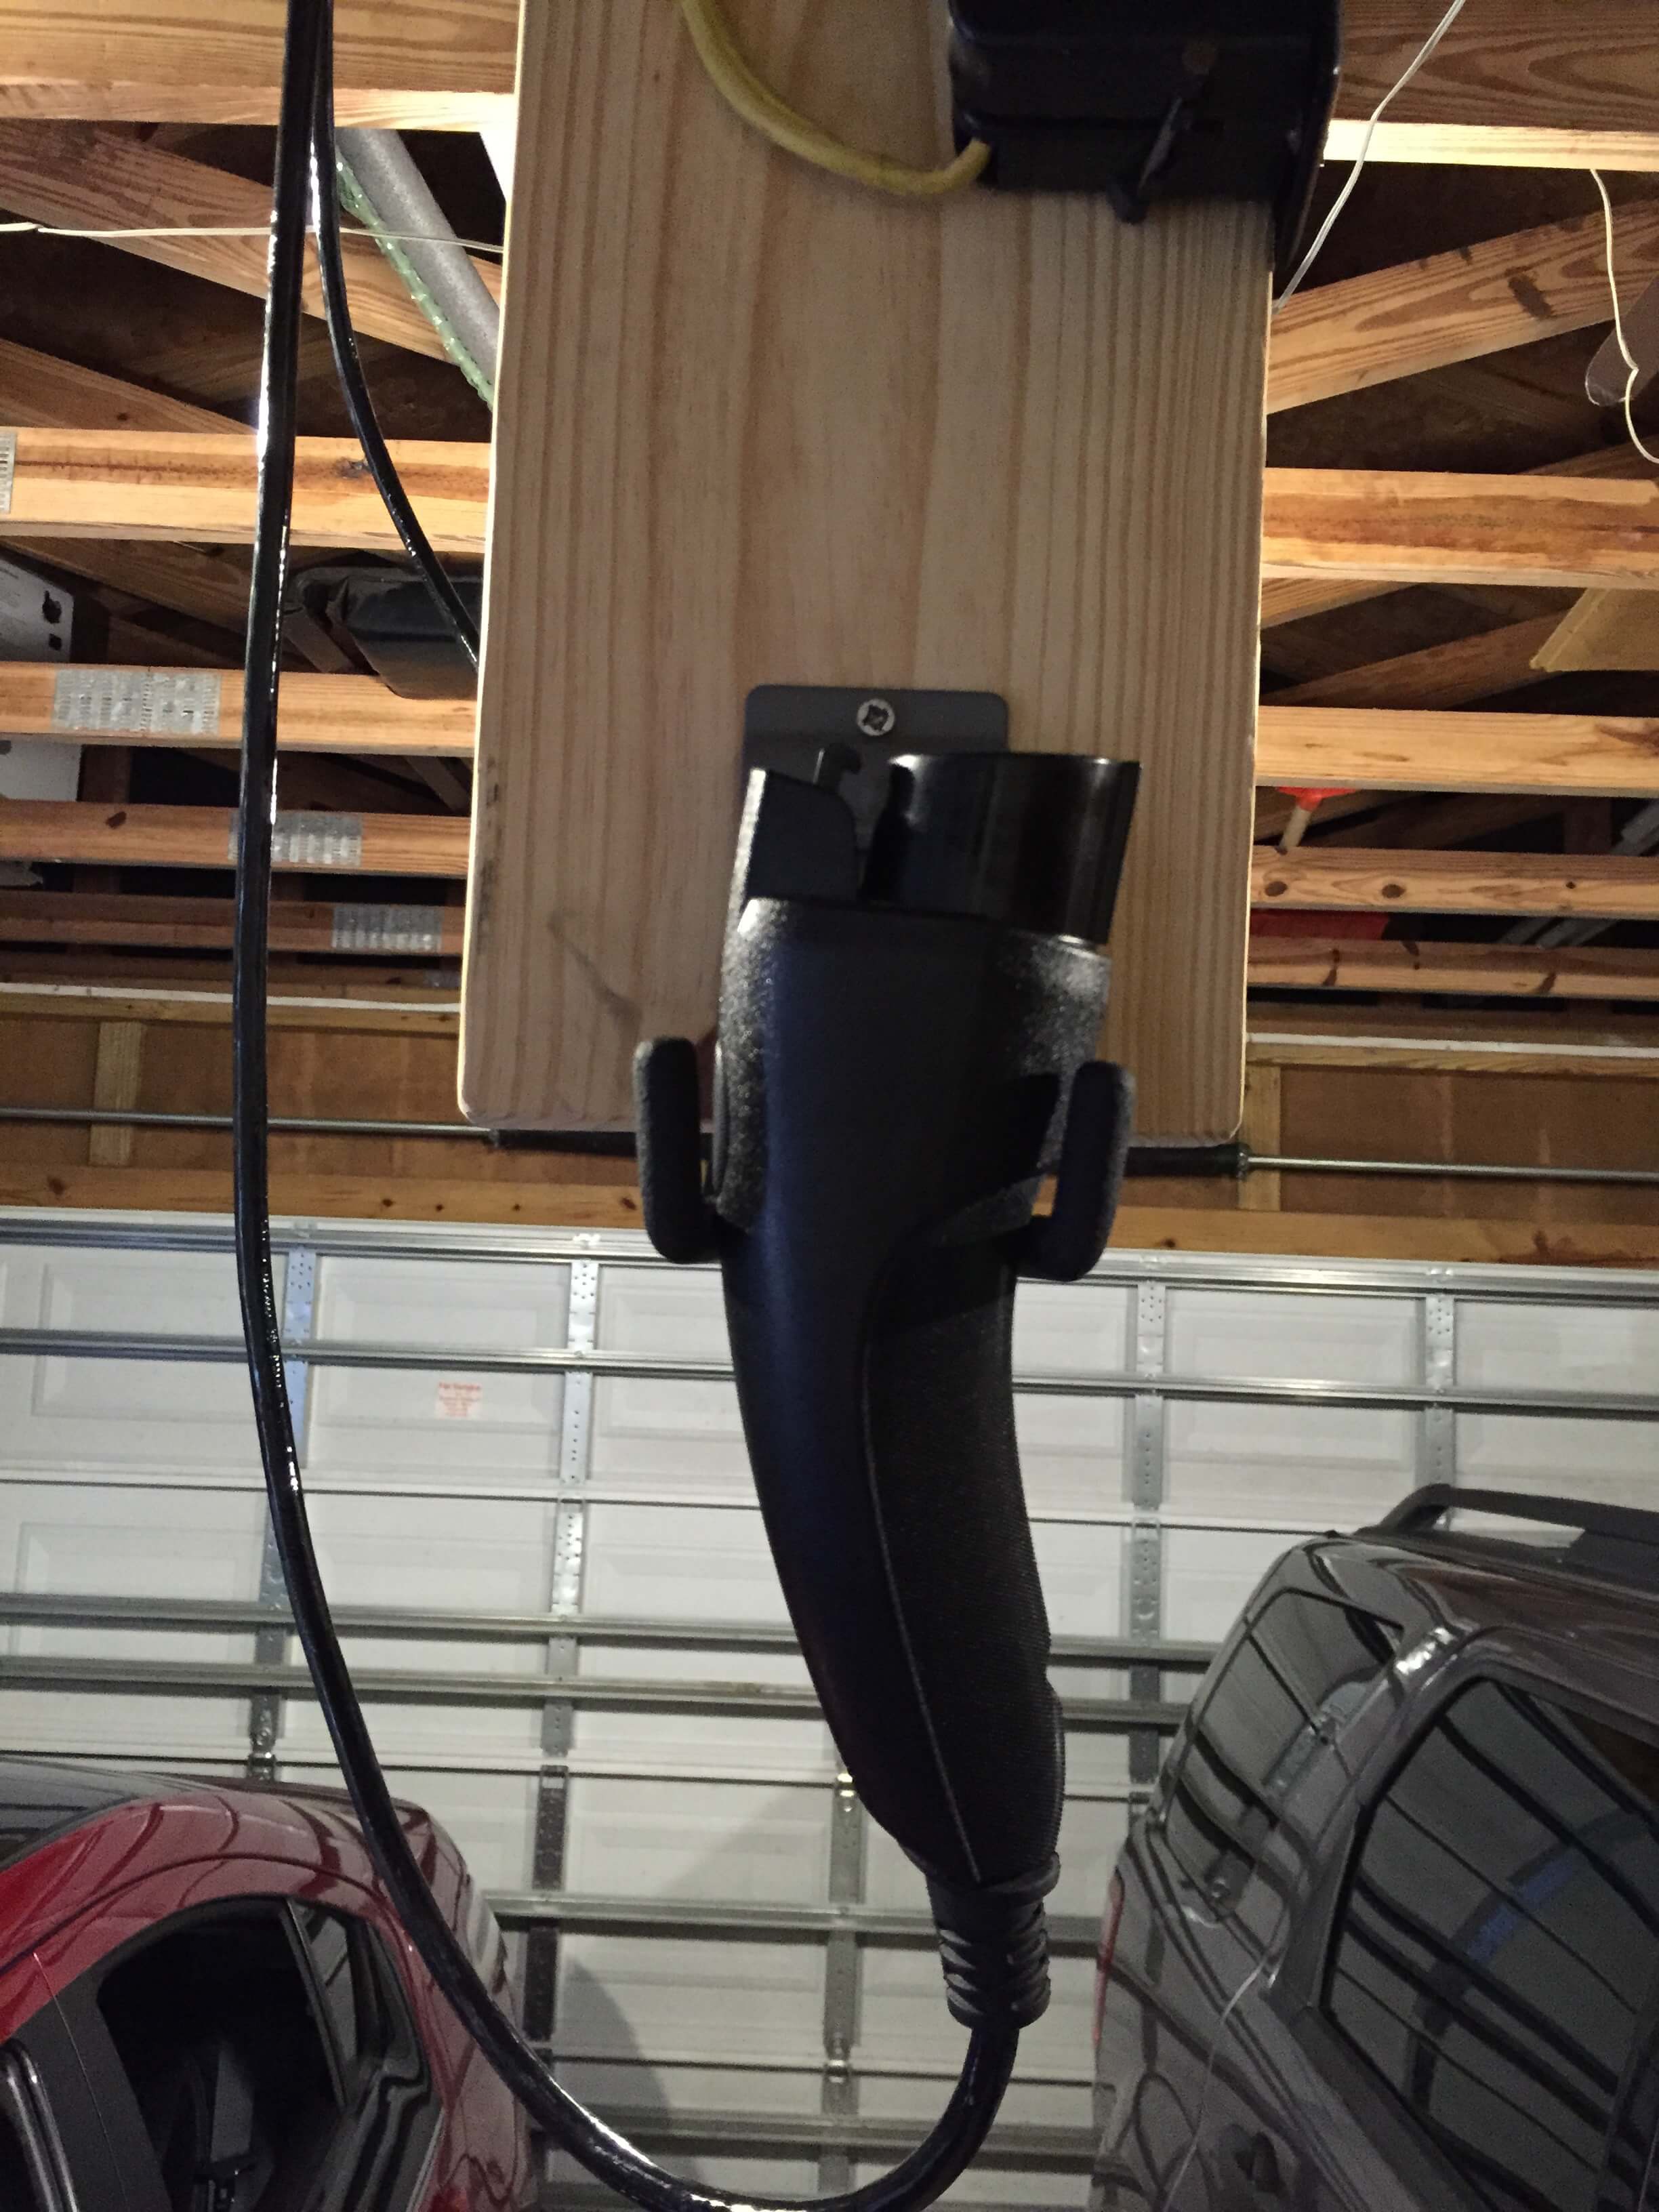
I originally mounted the charging station just below the garage door opener and then manually wrapped the cord around the unit. This worked great for me until the charger unit died and Chevy replaced it with one of a slightly different design. So I decided to redo the entire mount. I took the old one down and started from scratch. Below are the steps I took to create the current charging station setup. It works very well and keeps the unit out of the way when its not being used. It takes seconds and only one hand to plug in or unplug the car. At the end of this post is a video showing how easy this setup is to use.
Items Needed:
- 110v Outlet and Wire
- 110v Car Charging Station
- 2x8x4 piece of wood or similar
- Twin Hook
- 20 ft Retractable Laundry Line
- Screws
- Twist ties or similar
- Sander
- Drill
Sign Installation Items Needed:
- 1x2x8 piece of wood or similar
- 12″ x 18″ Car Charging Sign
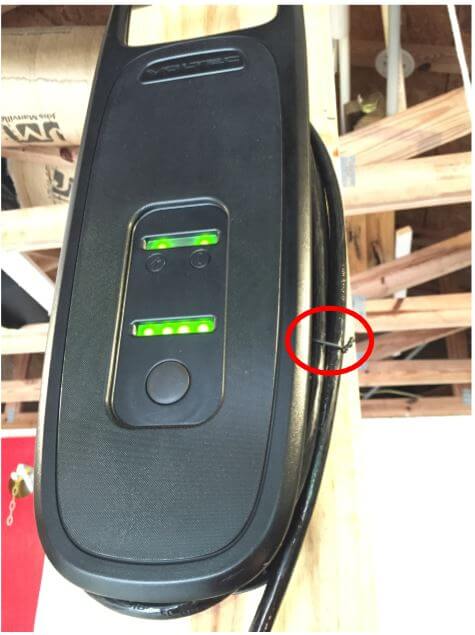
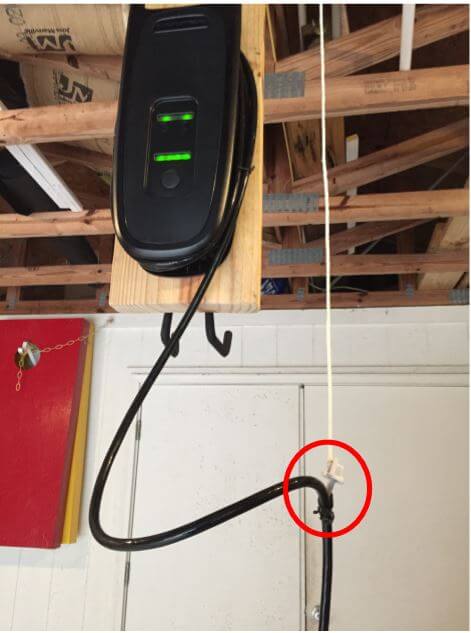
The 2 images below label many of the important points highlighted in the steps below.

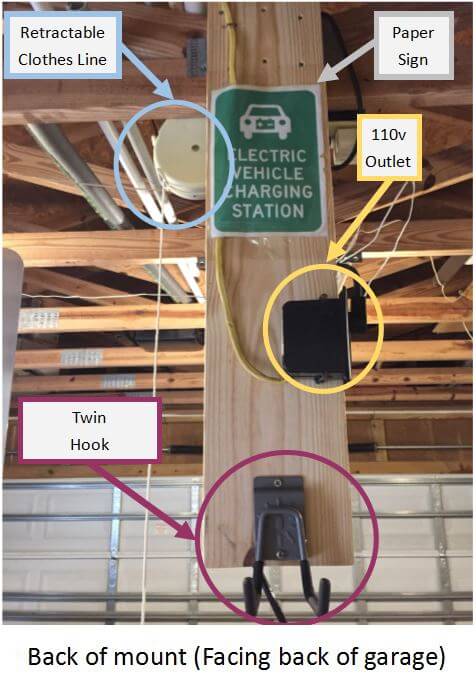
Step 1: Install the wood
Hang the 2x8x4 or similar piece of wood where you want the charger to be mounted. I mounted mine right behind the garage door opener. I don’t have a finished garage so it was easier to mount this piece of wood using the garage’s beams. If your garage is finished you might needs some sort of bracket to mount it. The position will also depend on what side of the garage you park on and how you park it. Ideally you want this charging station to be mounted right near where the charging port is located when the car is parked. You want the 2x8x4 to be high enough that it is out of the way but low enough that you can reach the charging cord. Another thing I would highly recommend is you have some sort of device to tell you where to stop in your garage. I have a yellow ball hanging from fishing line. When I hit the ball I stop. This helps ensure I am always parking pretty much in the same spot.
Step 2: Install the hook
Mount the Twin hook to the back of the 2x8x4 and near the bottom of it. Make sure this is in a position you can easily grab the cord from. If it is not then you will have to modify step 1 until it is. The one I purchased was from Lowes or Home Depot and is meant for a track system but by using screws I mounted it directly and it works fine.
Step 3: Install the Charging Station
Mount the charging station to the front of the 2x8x4 facing the front of the garage. Unwind enough of the power cord to plug it into the car. Now use a a twist tie to secure the line to the charging station. See red circle below.
Step 4: Install the retractable laundry line
Near the top of the 2x8x4 piece of wood install the retractable laundry line towards the front of the mount (opposite side of the twin hook). Now use a a twist tie to secure it to the charging station cord. Do this approximately 3 feet from the Charger Plug (the one that plugs into the car). See the red circle below. You may have to adjust its location on the cord. It is easy to adjust by sliding it up or down. You want it so it pulls up enough of the cord that it is out of the way. You can now unplug the car and place the charger cord plug in between the twin hooks and test it out.
Step 5: Install Outlet
Now you need to install the 110v outlet in a location it can plug into the charging station without any extension cords. If you don’t feel comfortable installing the 110v outlet please hire an electrician. Usually you can easily tap into the outlet that the garage door opener is using. Ideally though you should have the car on its own circuit.
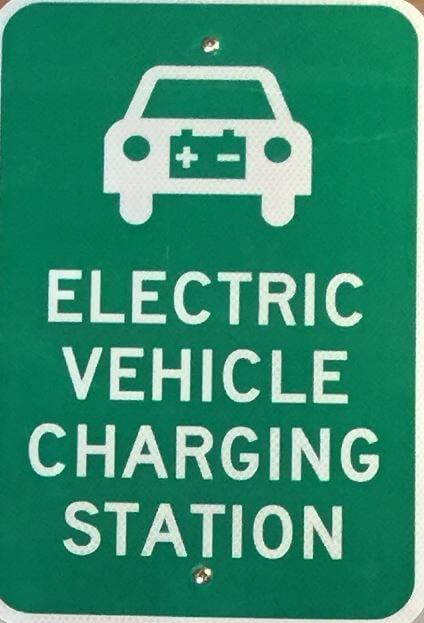
Step 6: Install the Sign
I also suggest installing a nice electric car parking sign to add the finishing touch. I used a 1x2x8 piece of wood and mounted the sign to it. I purchased the sign from www.myparkingsign.com. There are many different ones to choose from and you can even have a custom one made. They also provide a free pdf so if you want you can even print the pdf on photo paper and mount it instead of spending any money. For my sign I purchased the Diamond Grade because I wanted nothing but the best.
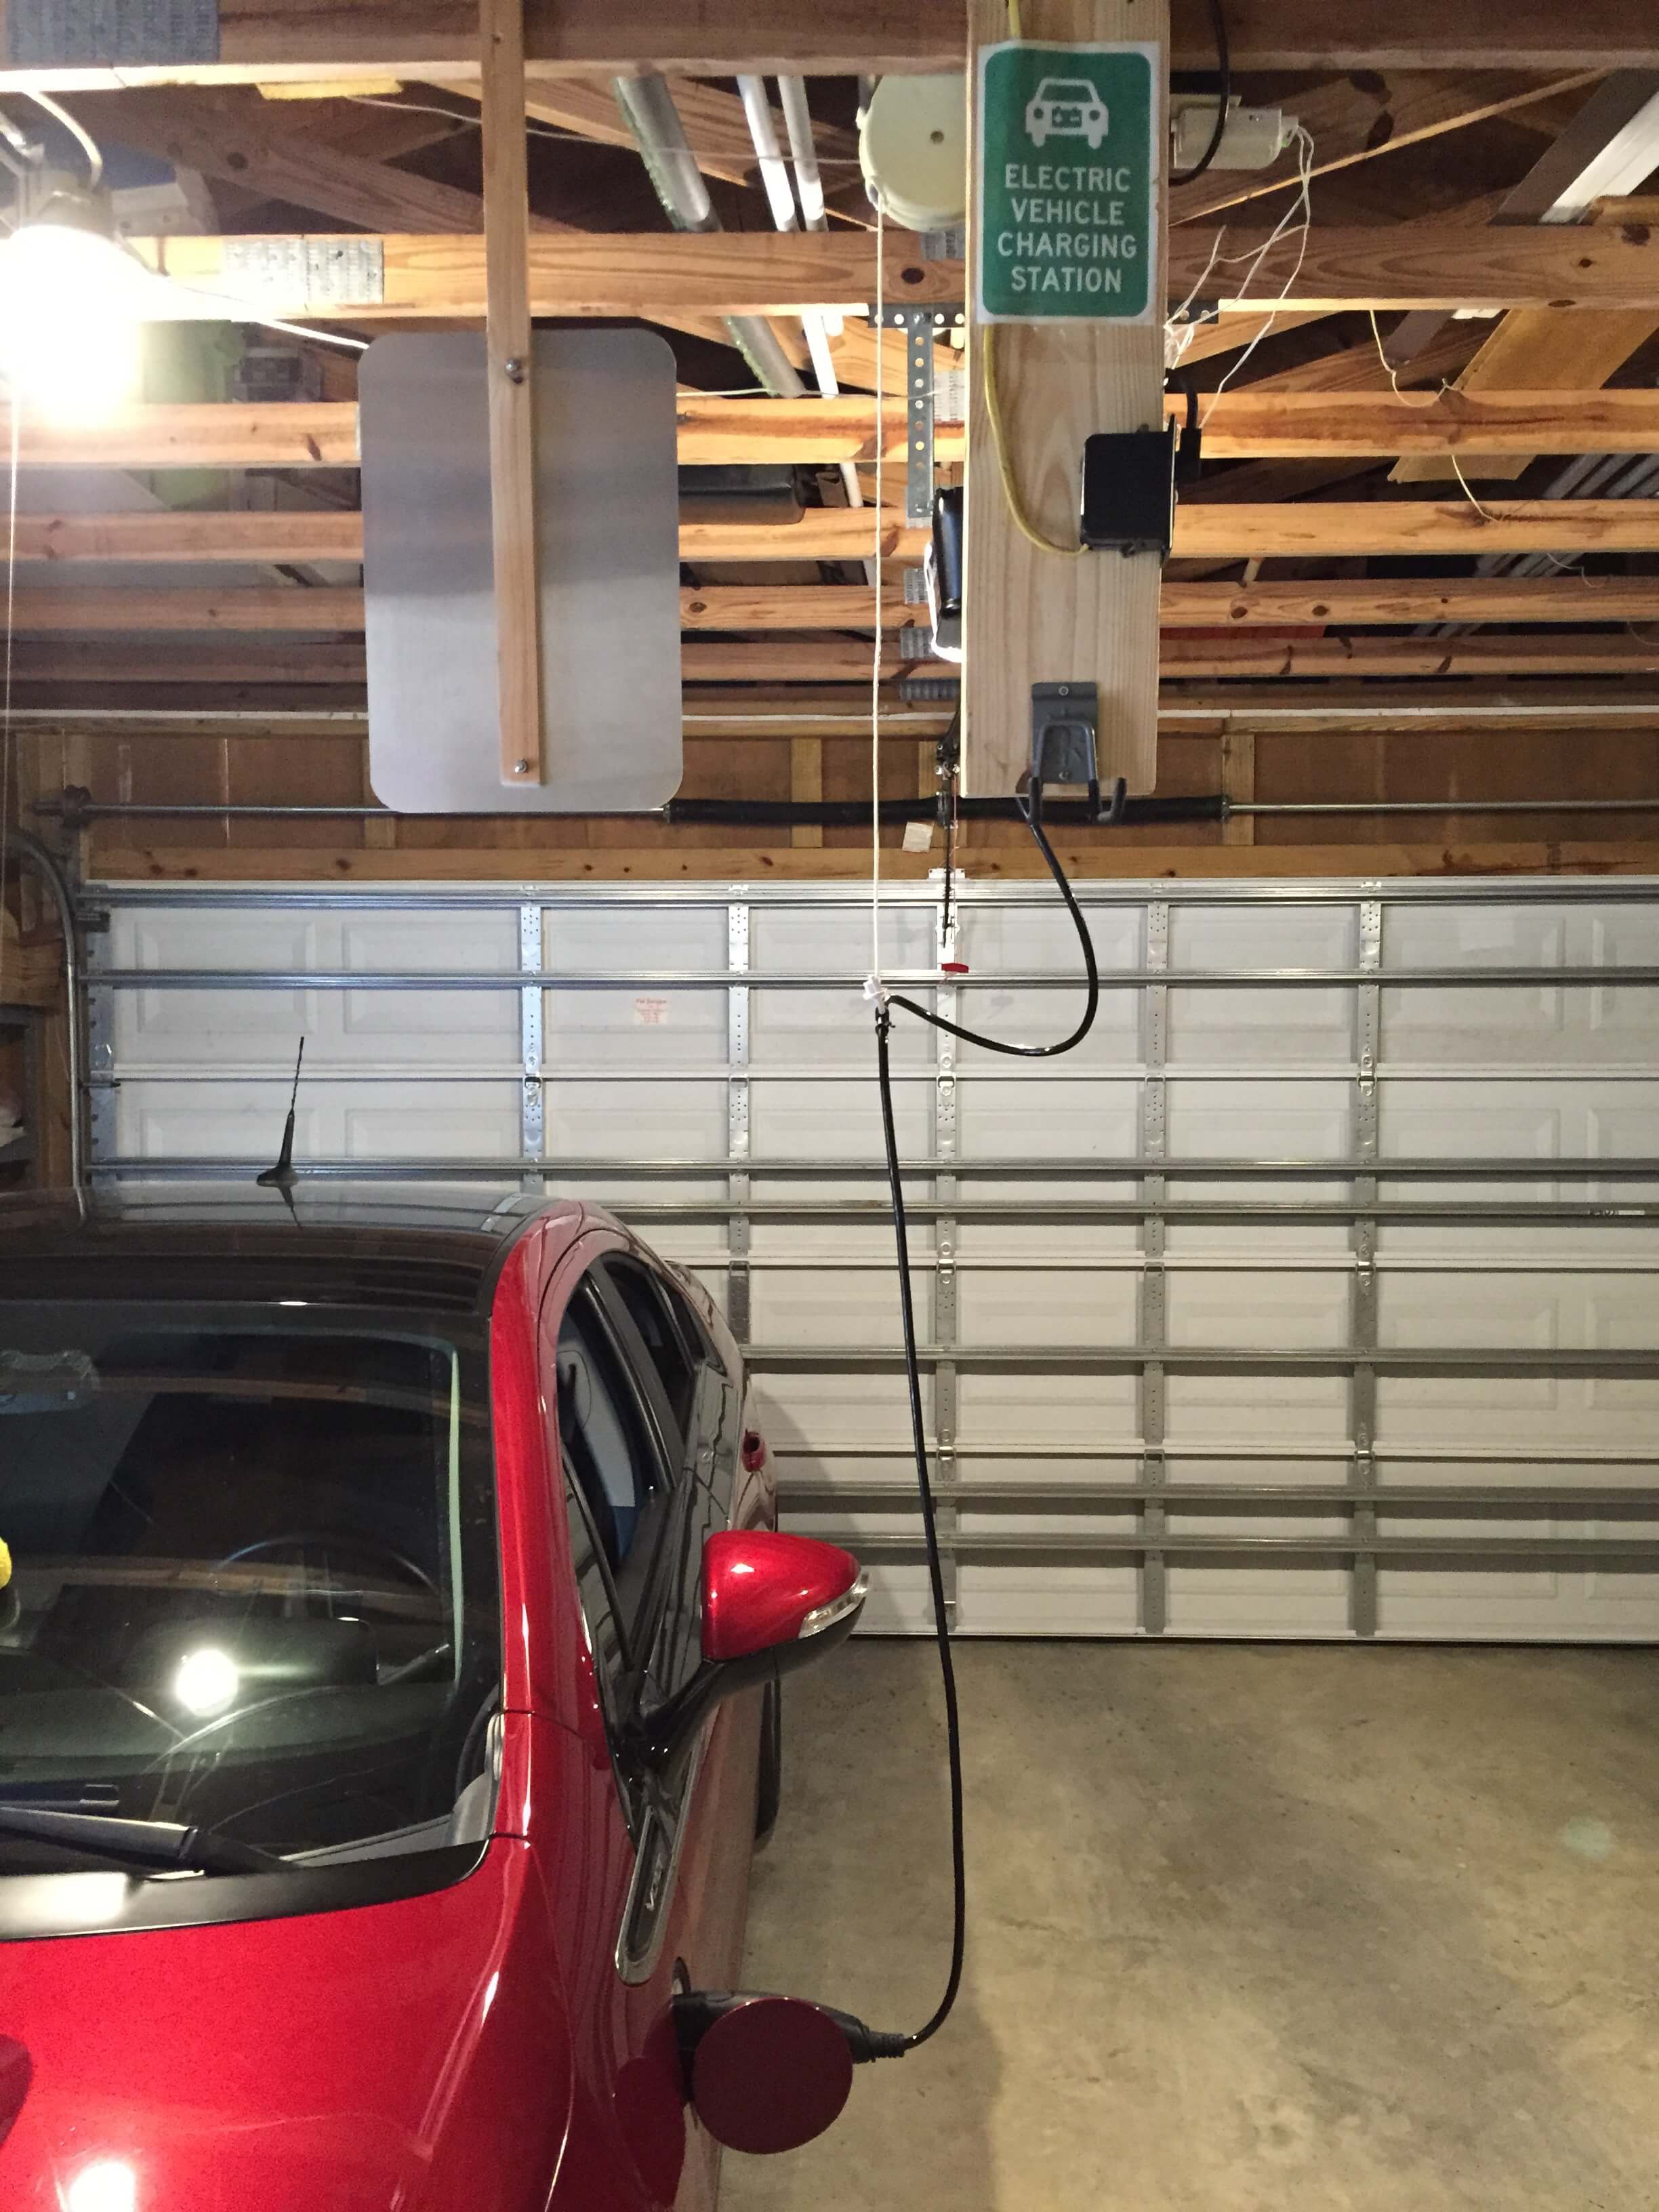
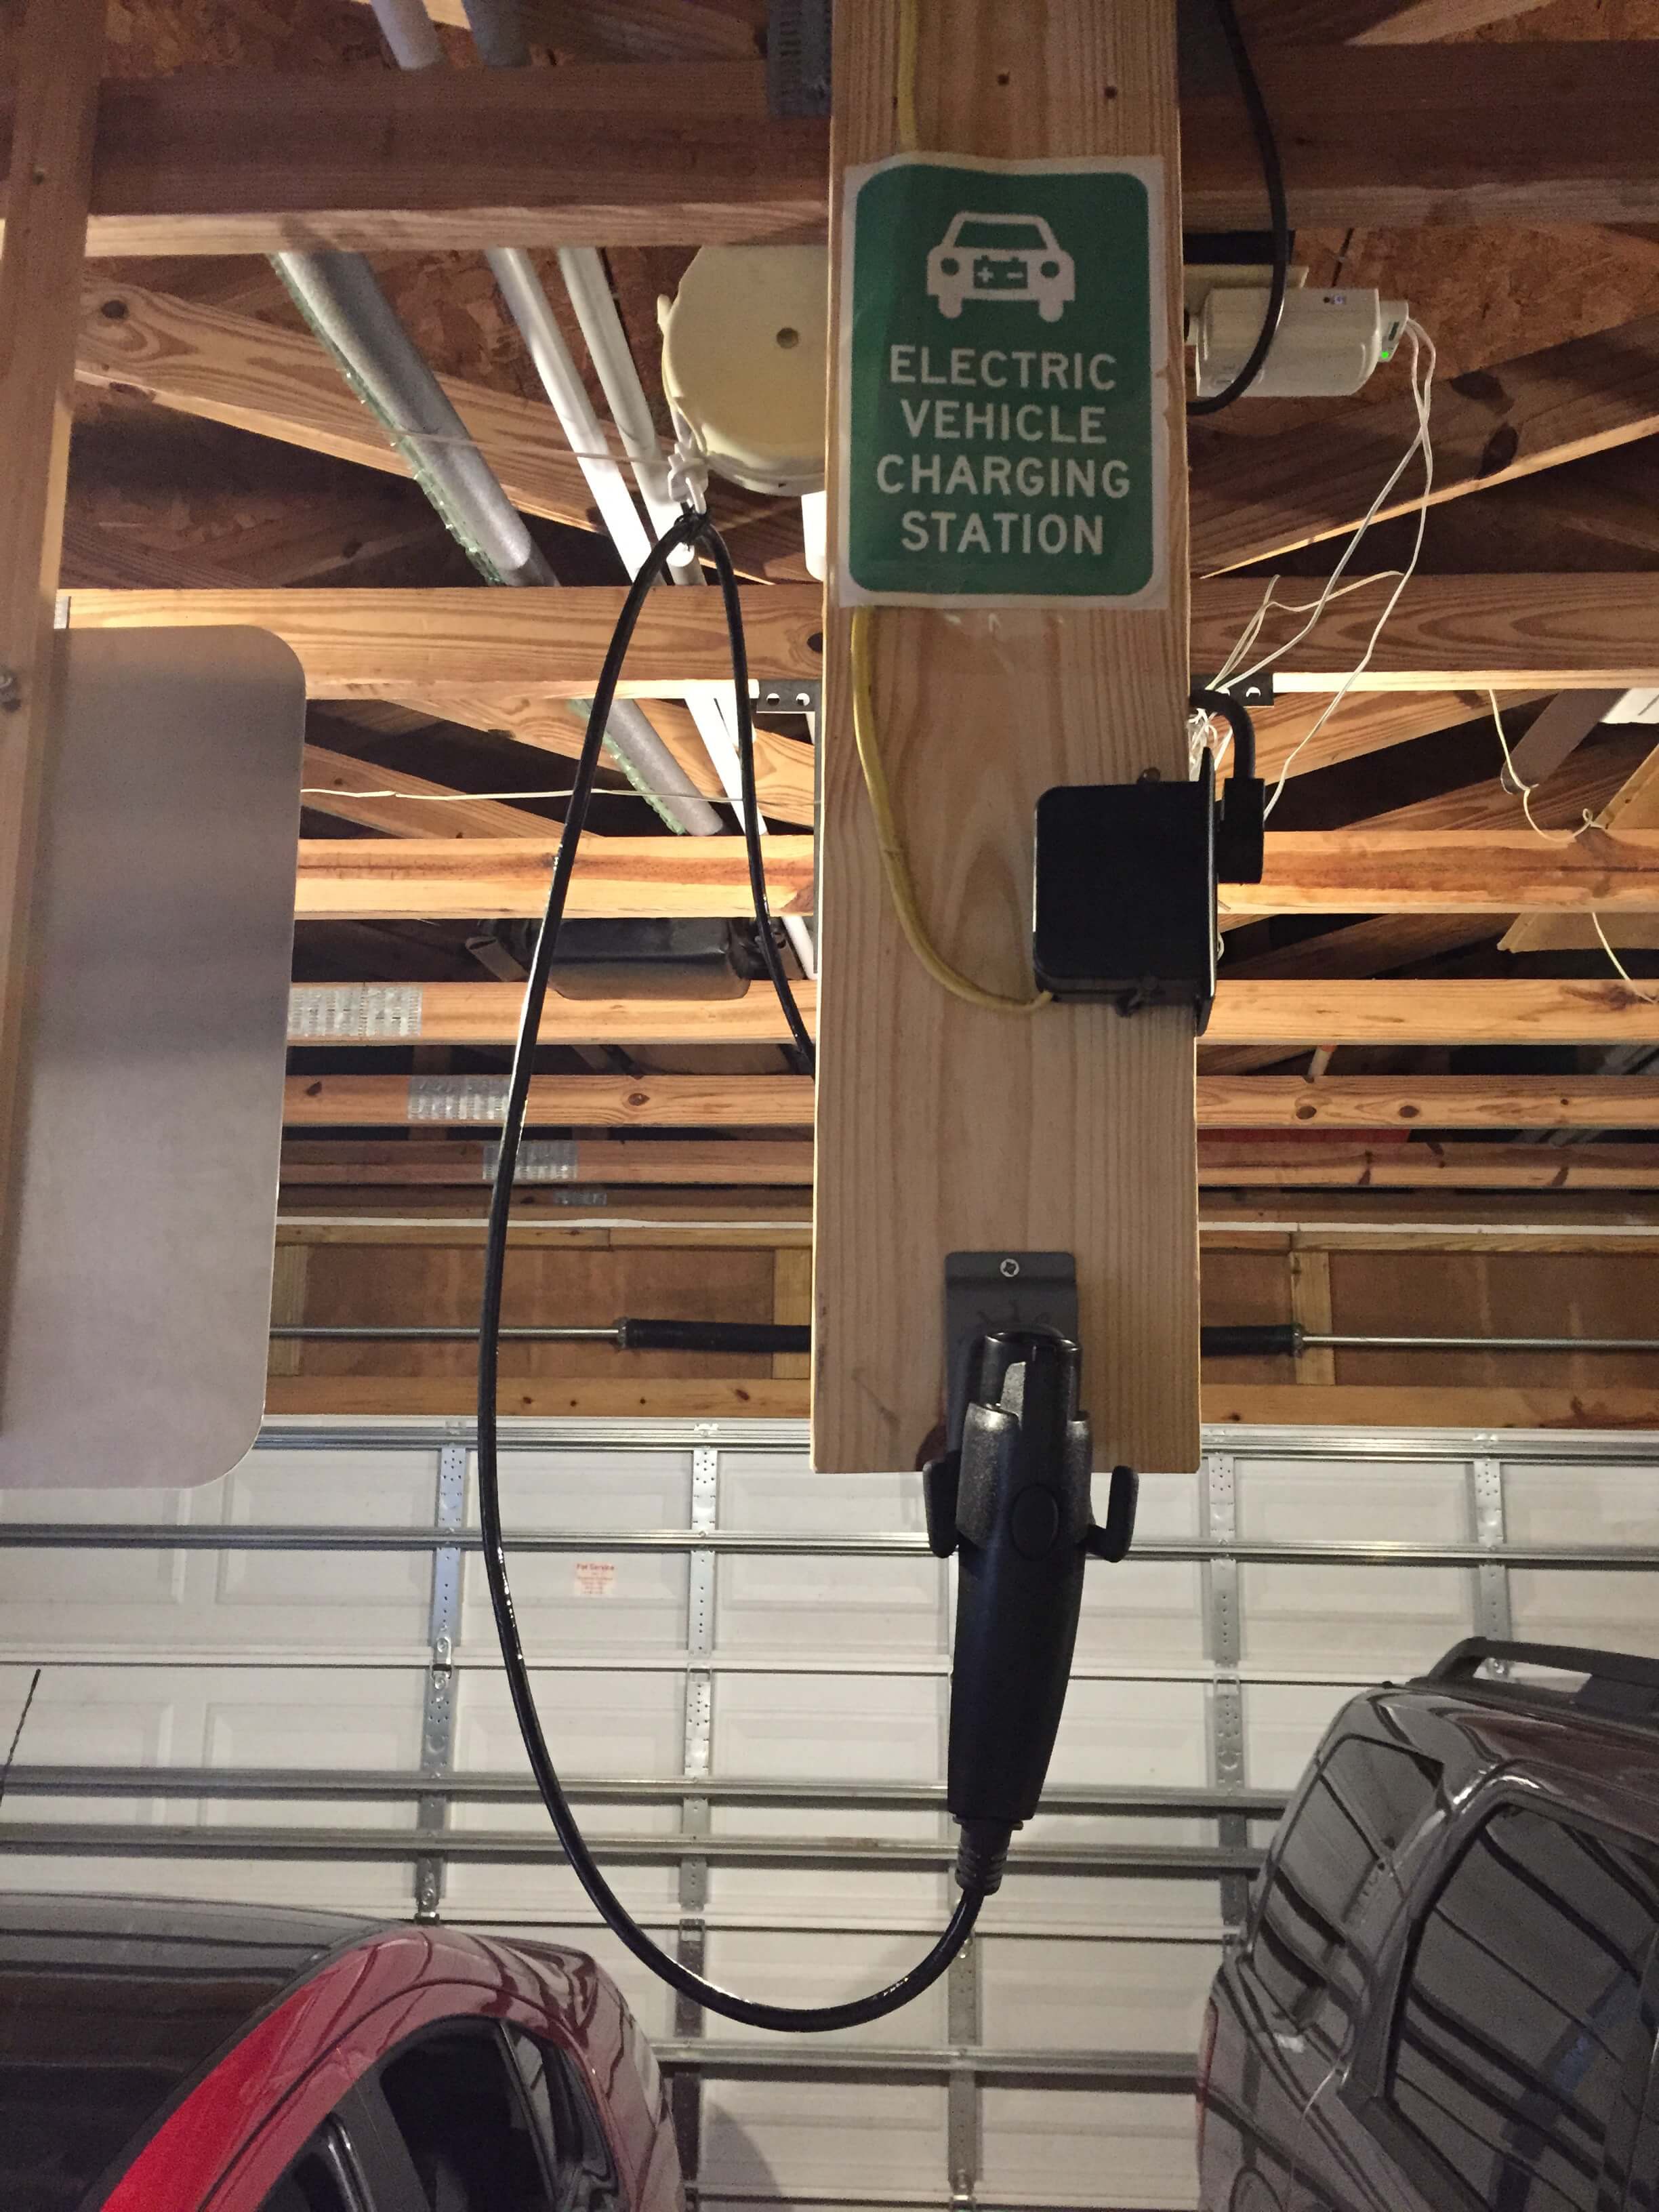
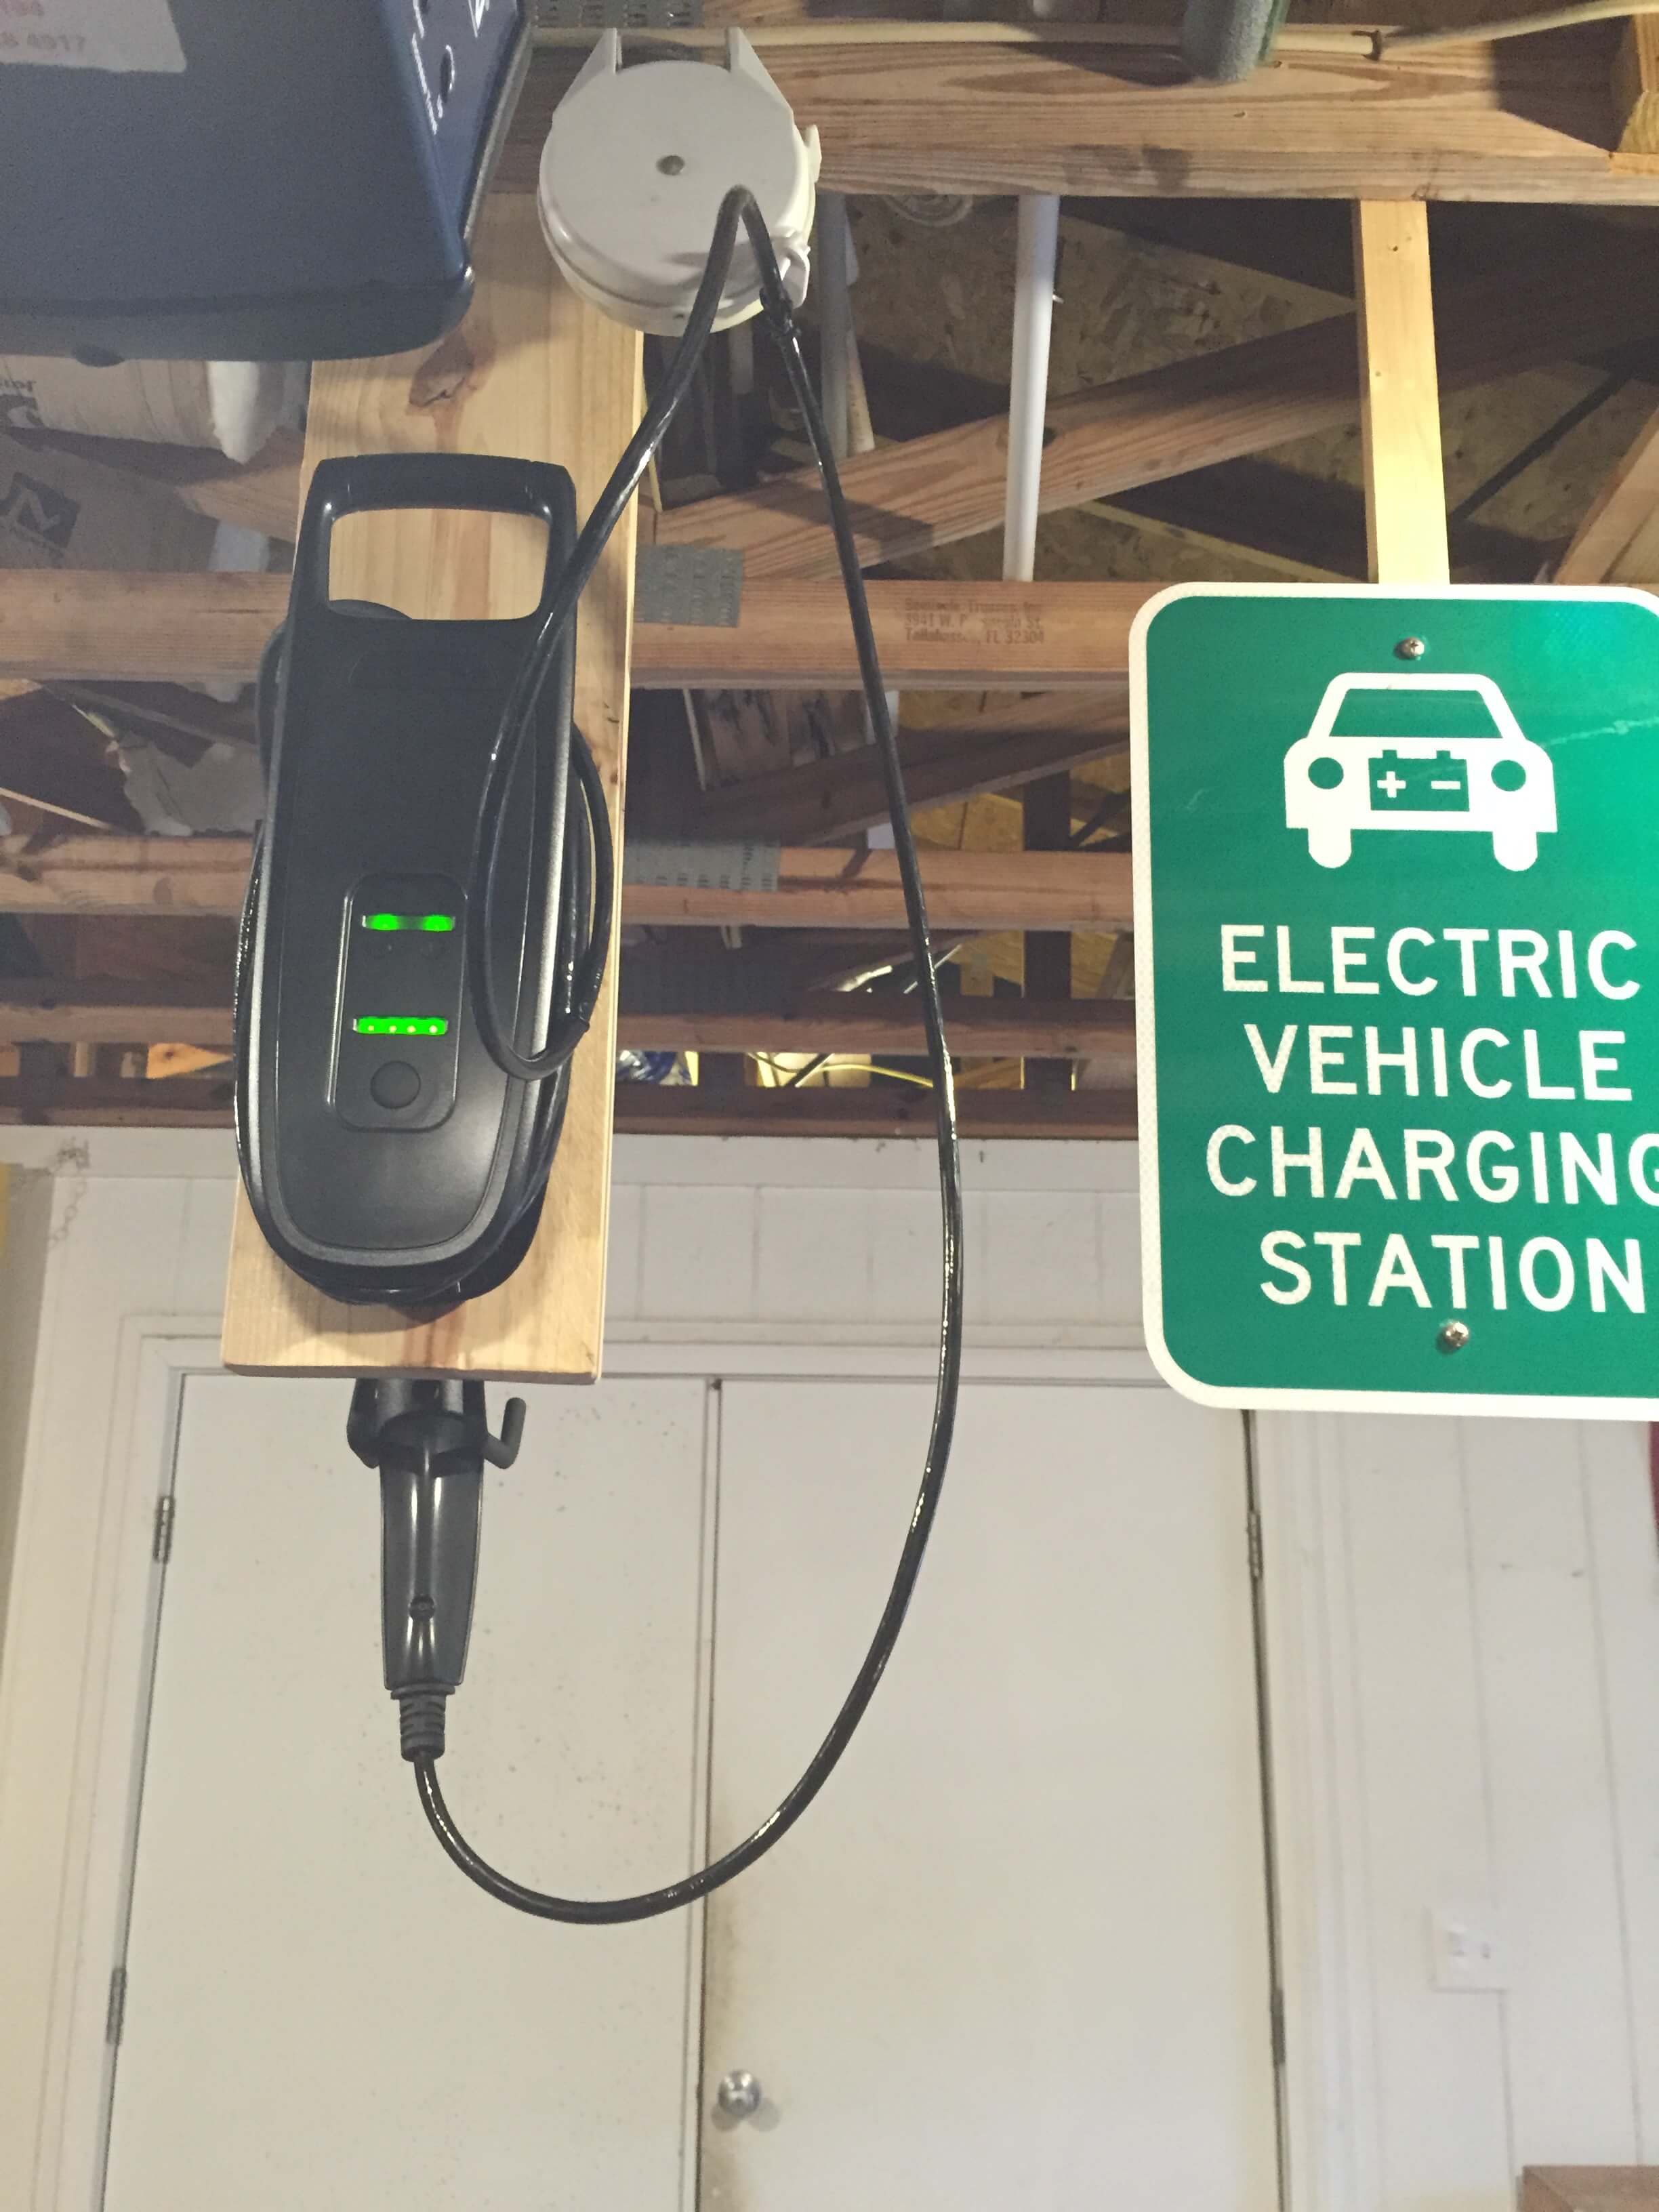
Notes: The retractable laundry line is not very powerful but it is enough to keep the power cord up and out of the way. WD40 helps keep it nice and lubed up and working great. Sometimes you need to twist the charge connector when inserting it into the twin hooks so the cable is raised away from the charging station mount. I used twist ties for the cable connections so that they can be easily undone if I need to take the charger with me when I travel. It also helps to mark where on the cord you put the twist tie. Either with a marker or electrical tape. This way when you take it down you know exactly where to put the twist ties.
Disclaimer: Links on this page that go to Amazon.com will provide me with a referral credit if you purchase using the links.