I am going to create a series of posts about the construction of my garden pond. This was done back in Early 2014 before this blog existed. This is a chance to get you caught up and should be very informative.
We purchased our home in late 2009 and even before then I knew I wanted a pond. I had lots and lots of landscaping to do way before I could start planning the pond but I would defiantly have one. This would be my third garden pond. I build 2 others previously when I was living with my parents. Both of those ponds were much smaller than the one I had in mind. After finishing the landscaping and clearing out lots of trees I was finally ready in early 2014 to begin construction. In this post I’m going to talk about the pond planning, layout and the beginning of the digging. Below are the steps I took to build the pond.
Materials Used:
- Old Garden Hose
- Green Marking Paint
- Garden Dump Cart
- Digging Shovel
- Edging Shovel
- Transfer Shovel
- Pick Mattock
- Axe
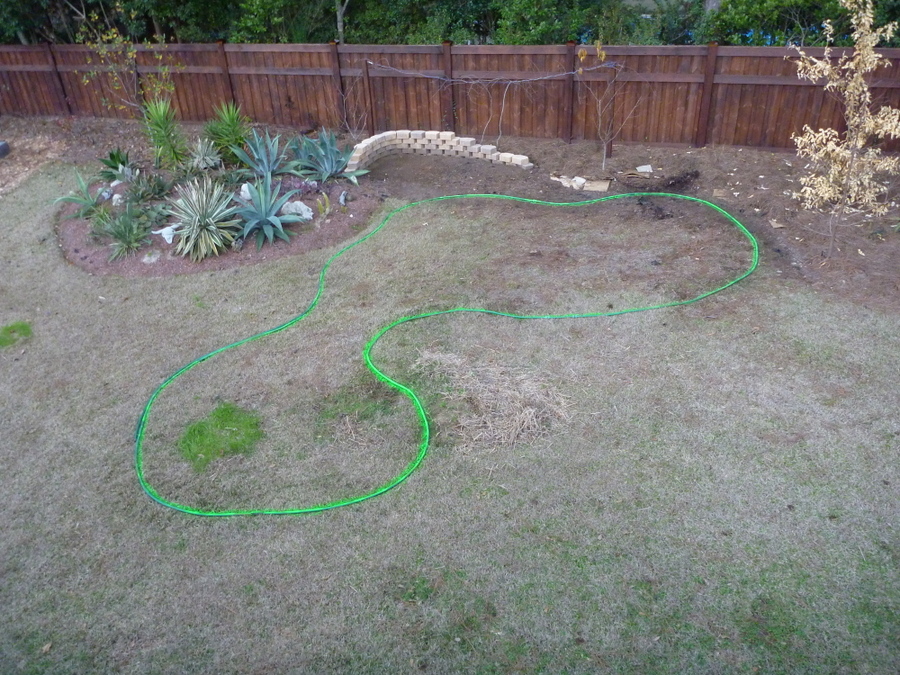
1.) Select site of pond and then mark boundaries. This might sound easy but I needed a place that had mostly full sun, little trees overhead and was in a higher section of the yard, so water from the lawn would not mix into the pond. After much decision making I had the perfect place and it was exactly where I wanted to build a greenhouse. To me though the pond was more important and got the priority for that spot. I still plan on building a greenhouse but it will in a different spot. Once I selected the site I needed to lay out a hose to define its shape. I laid down a garden hose and then I painted with some marking spray paint to mark the spot.
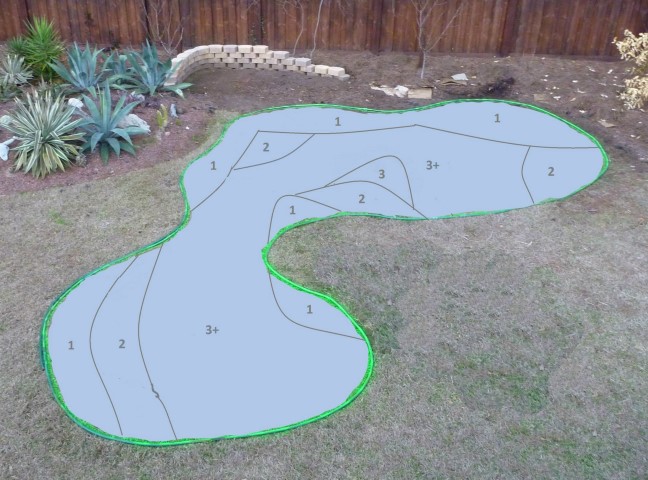
2.) Plan the digging. I used the image above to create a template so I could use my computer to draw the levels I wanted.

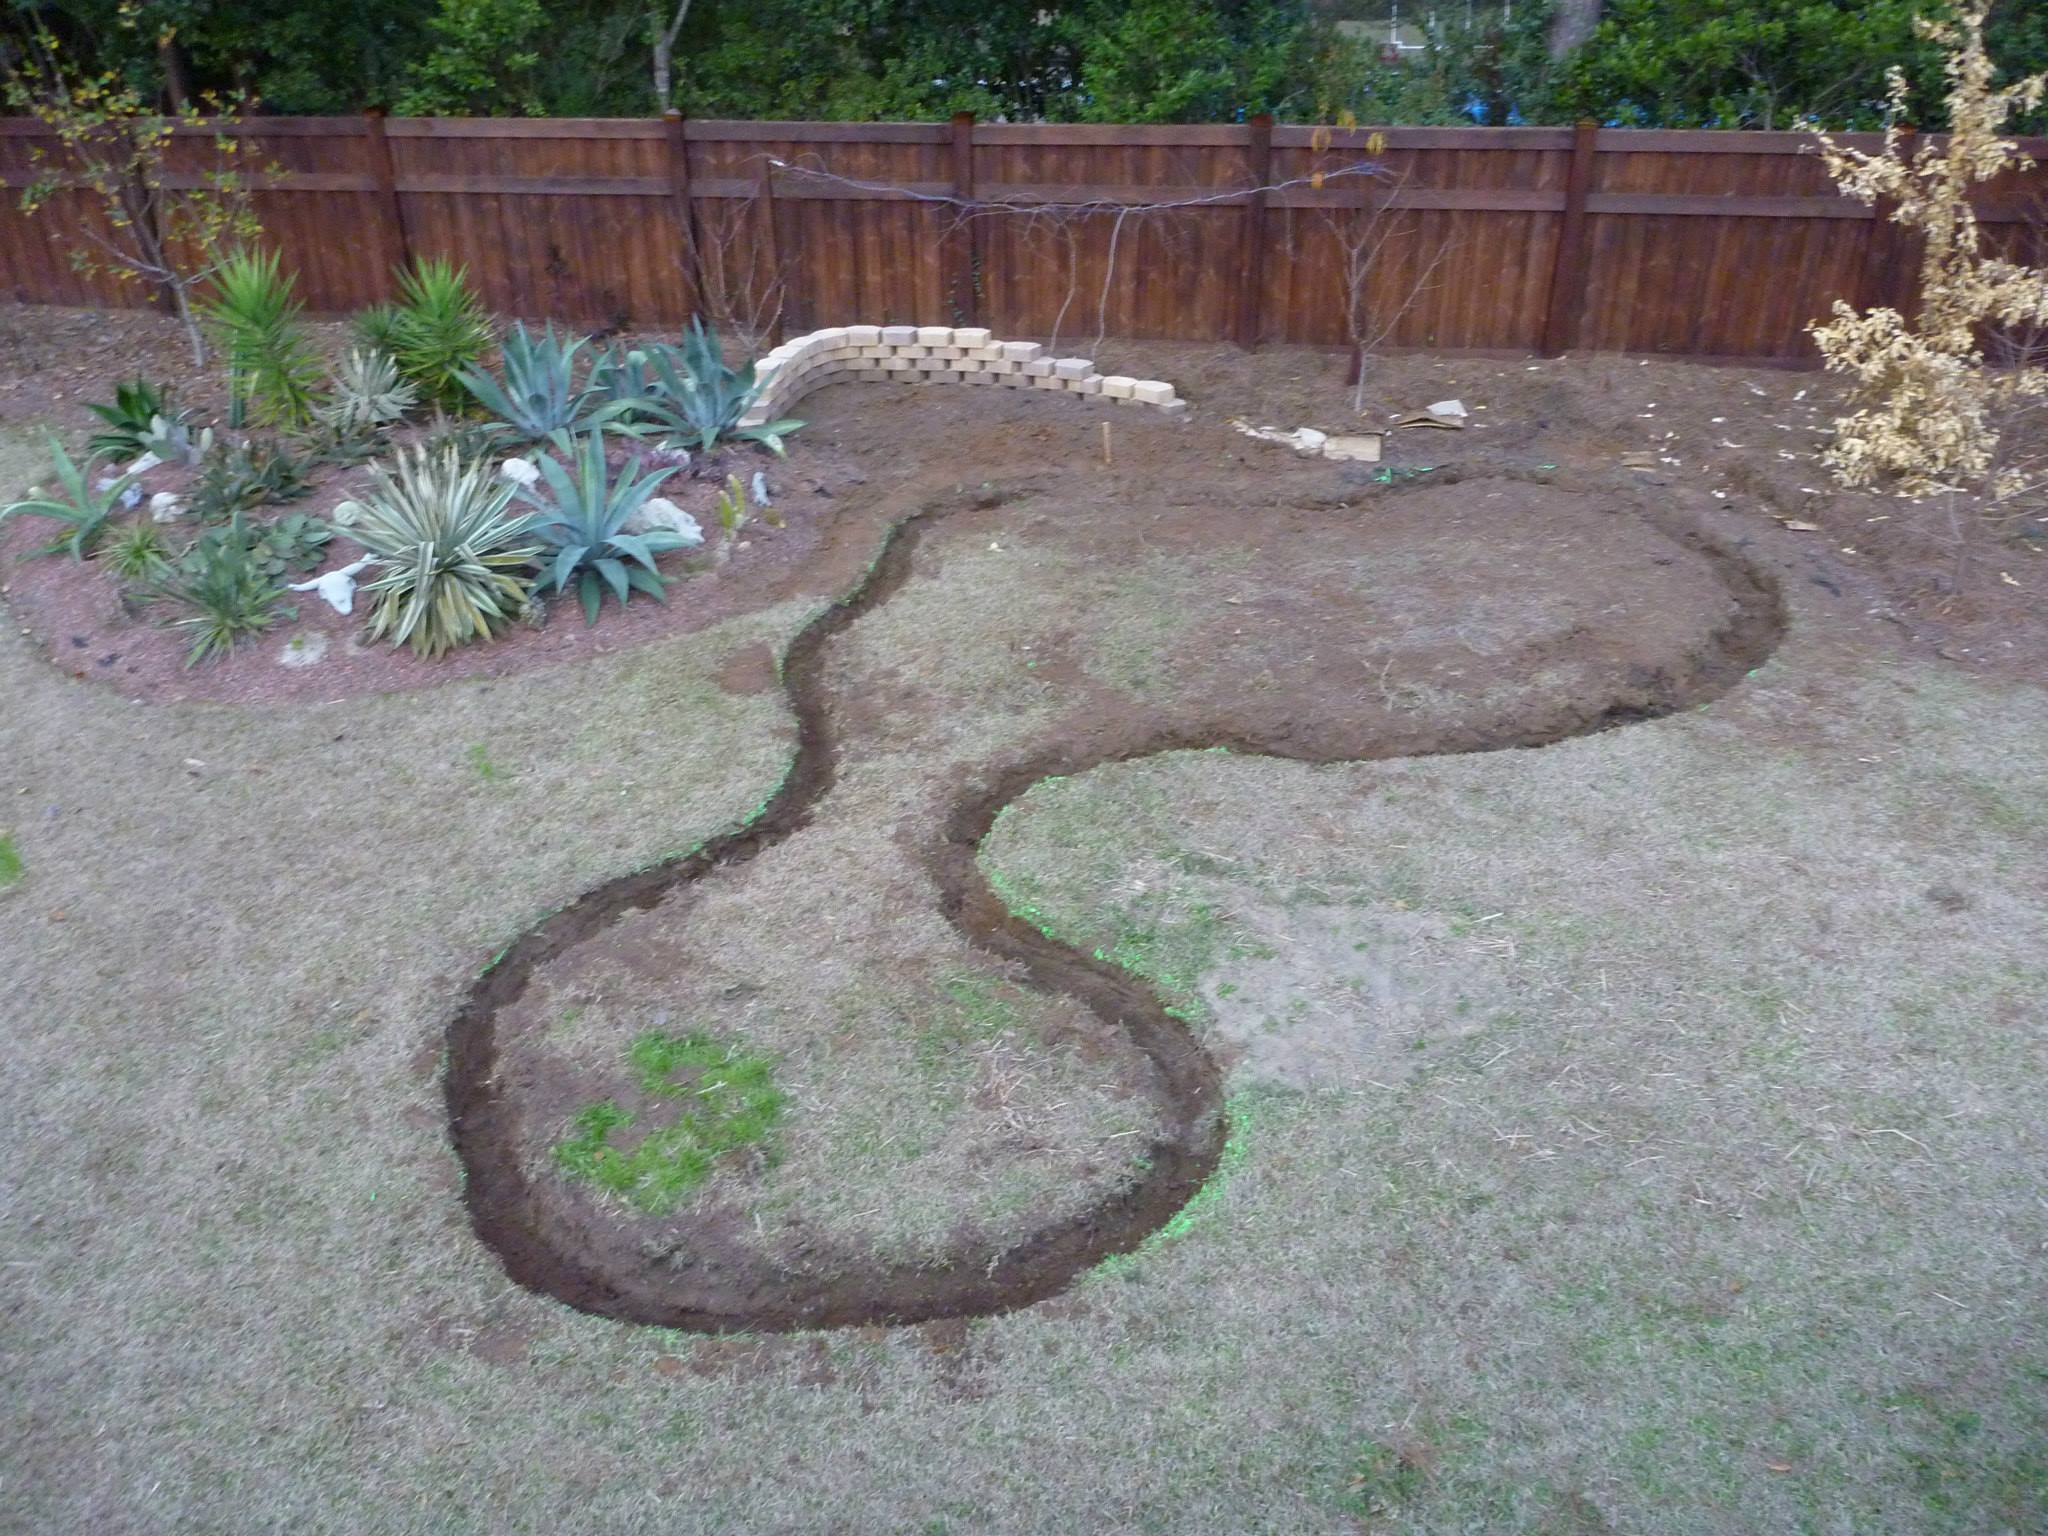
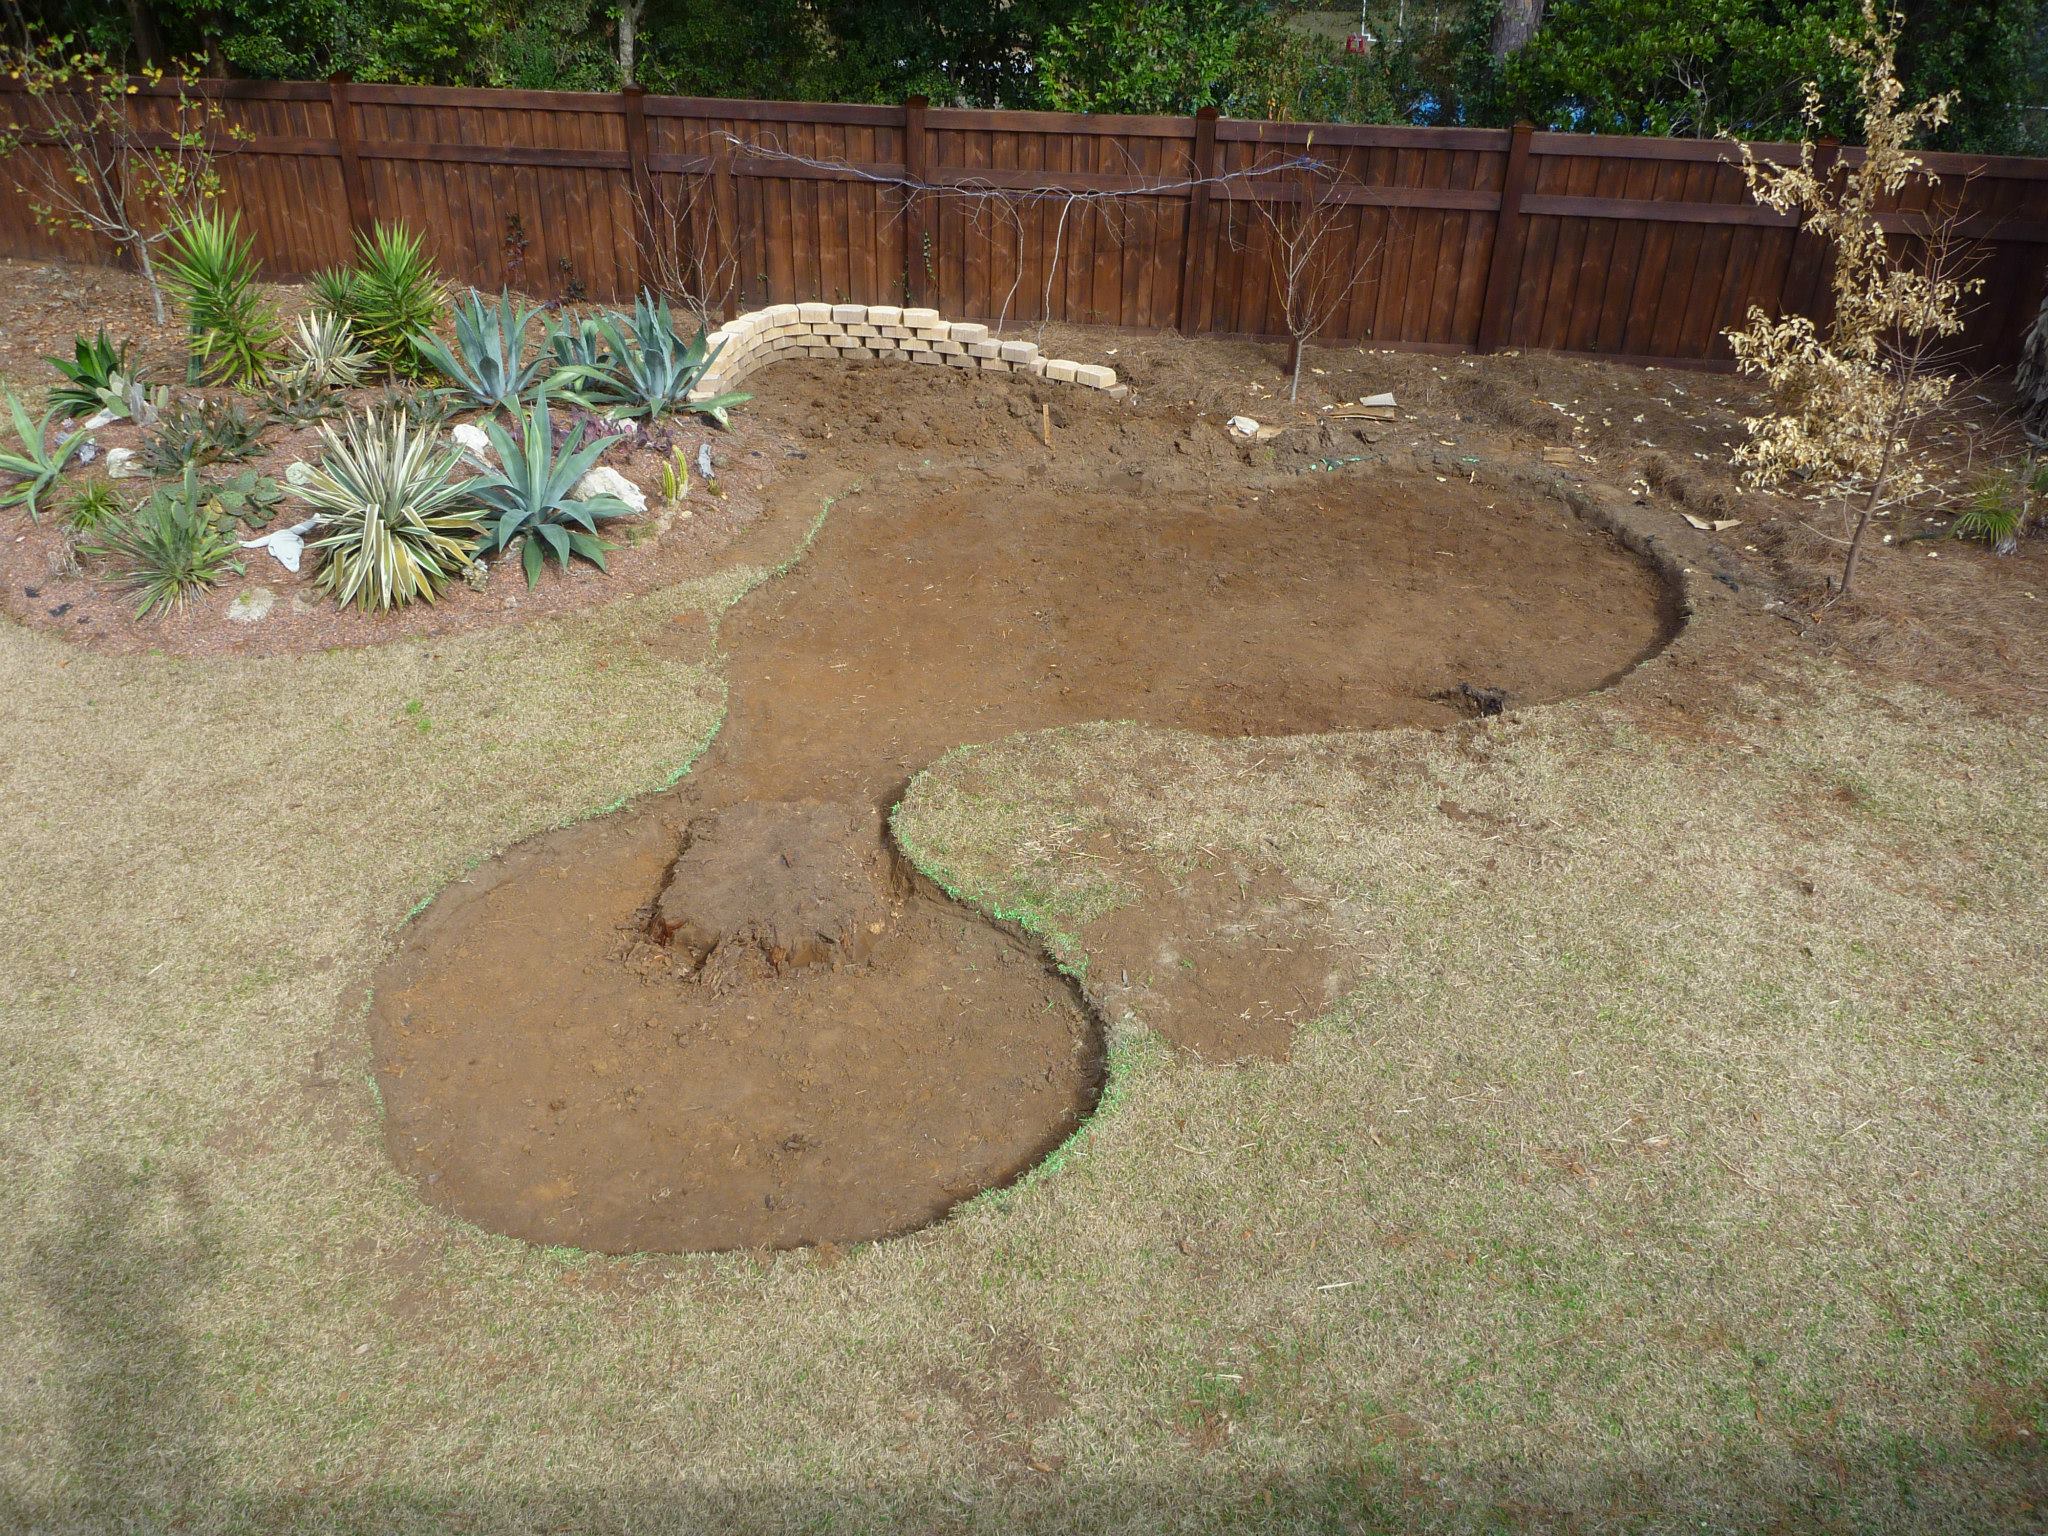
3.) Start Digging. I prepared for digging by setting up a wall to hold the dirt that will eventually become the waterfall. I also mentally marked where I wanted the water to run-off when the pond overflowed. Originally I was going to rent a backhoe or something to dig up the pond. However I decided to save some money and I wanted to take my time anyways so I hand dug the pond. This had the added benefit of being able to slowly get rid of dirt. I had a great idea to get rid of the dirt. Outside of my fence I made a pile of dirt, I even added a sign that said free dirt. Believe it or not the stuff was scooped away faster than I could put it out there. I even had someone knock on my door asking when more would be there. Eventually the pile started growing faster then it disappeared and I solved that problem by posting its location on craigslist.
With this phase of the project I had one big issue. There was a big stump in my pond. You can see it in the picture above. This stump is from an old pine tree we had taken down when we purchased the house. We had the stump was grounded down but they don’t go very deep. Because I knew I wanted to go down at least 3.5 feet we couldn’t just get another stump grinder to take care of the rest. I tried hacking away at it with the axe but it was a lot of work. I eventually decided to dig around the stump and burn it down. I burned it for several days and several times before I was able to get a bunch of it away. The pieces that remained I used to axe to chop them up.
Next Post: Part 2 Pond Construction – Equipment Planning & Choices